Self-registration
In the previous tutorial, we learned how to register a new business partners through the business partners app. This process works just fine if you know some of the data about your business partner in advance. Usually, you will know some information, like the name of the business partner and the information of a contact, but most of the times, you will not know the exact address of their locations, their fiscal identifiers or have their fiscal documents in hand to upload it. The self-registration process allows you to detach yourself from the registration process, simplifying the flow. To start off, we will need to create a business partner invitation, which you can create by entering the app through the Business partner invitations card in the BUSINESS PARTNERS card group.
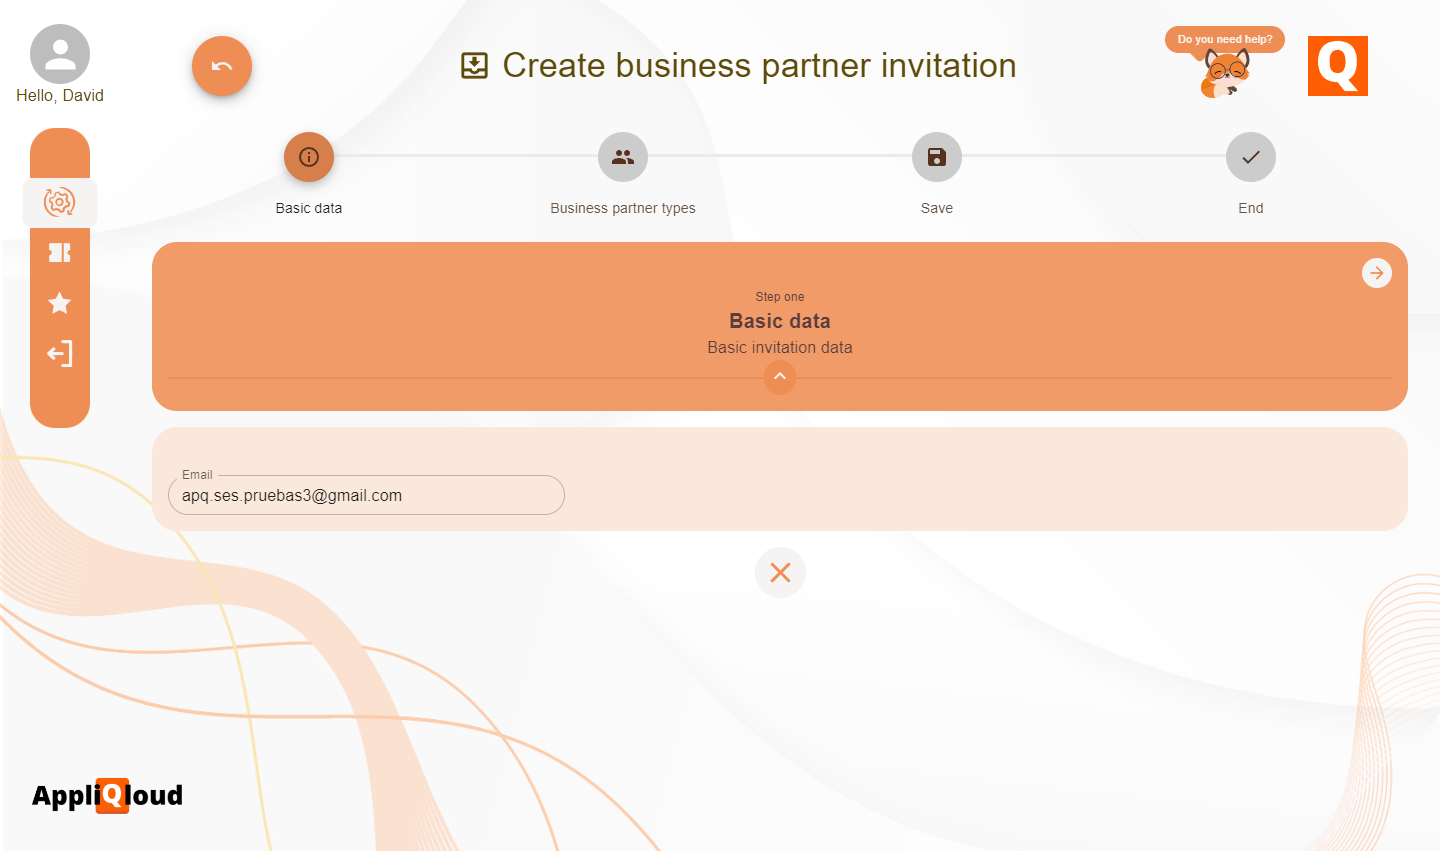
The first step when creating an invitation is to select an email address that will receive a templated email inviting them to register as a business partner, if you don't know the email address that should receive this invitation, you can leave this input as blank.
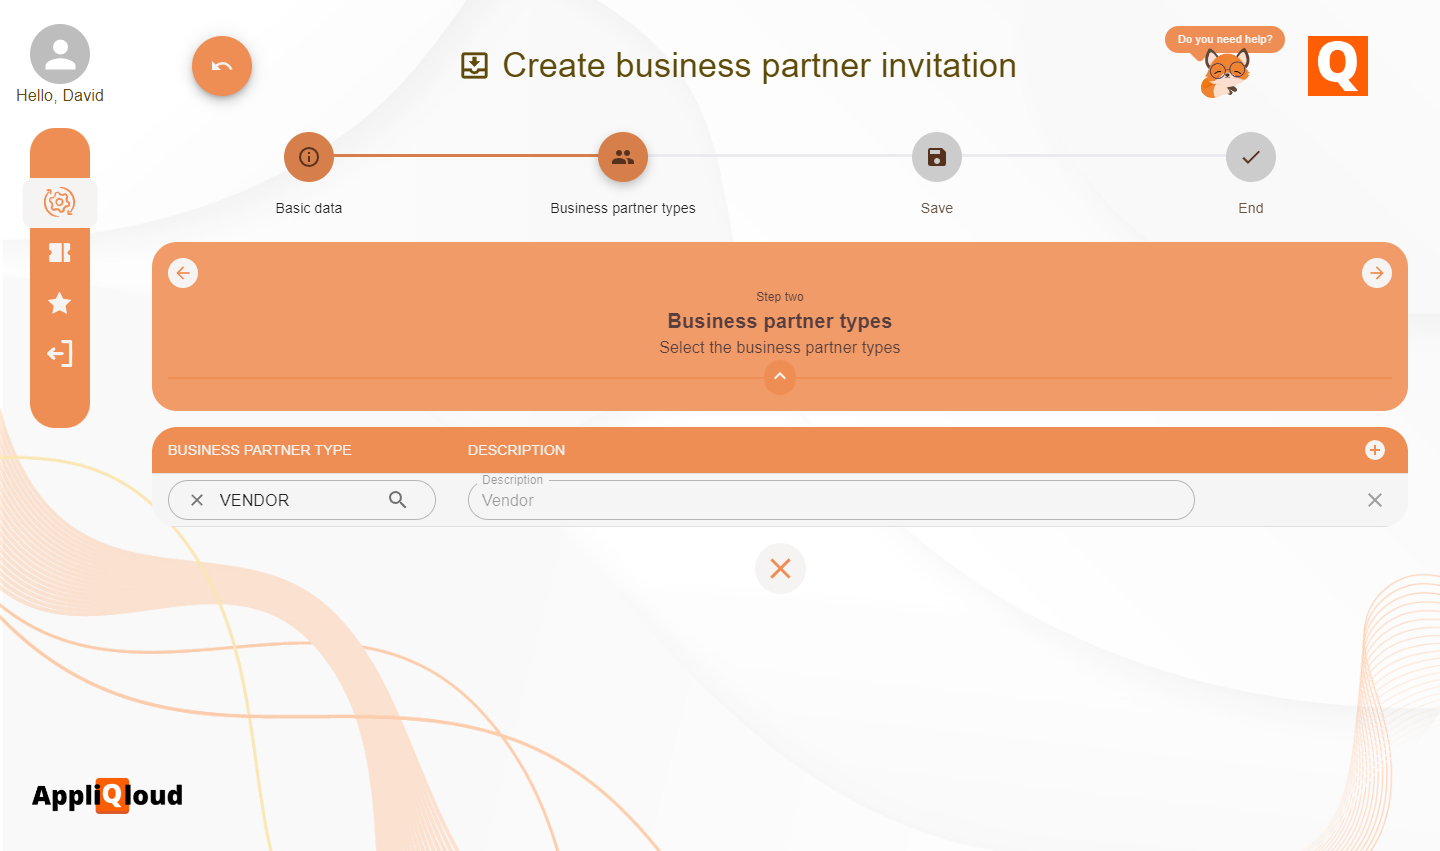
Then, we will need to select the business partner types that the business partner created through our invitation will have. Version 1.1.x of AppliQloud only has the Vendor business partner type, so we will choose that.
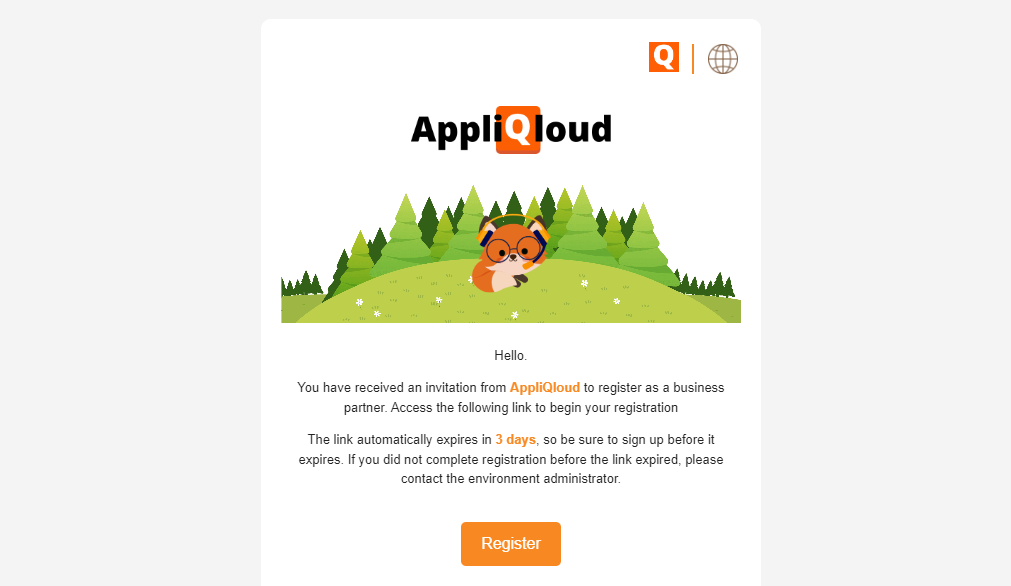
When saving the invitation, we will see a link in the confirmation step, if we did not provide an email in the first step of the form, we can copy this link and send it to our business partner. In this example, we did provide an email so we will enter the inbox and see the sent mail.
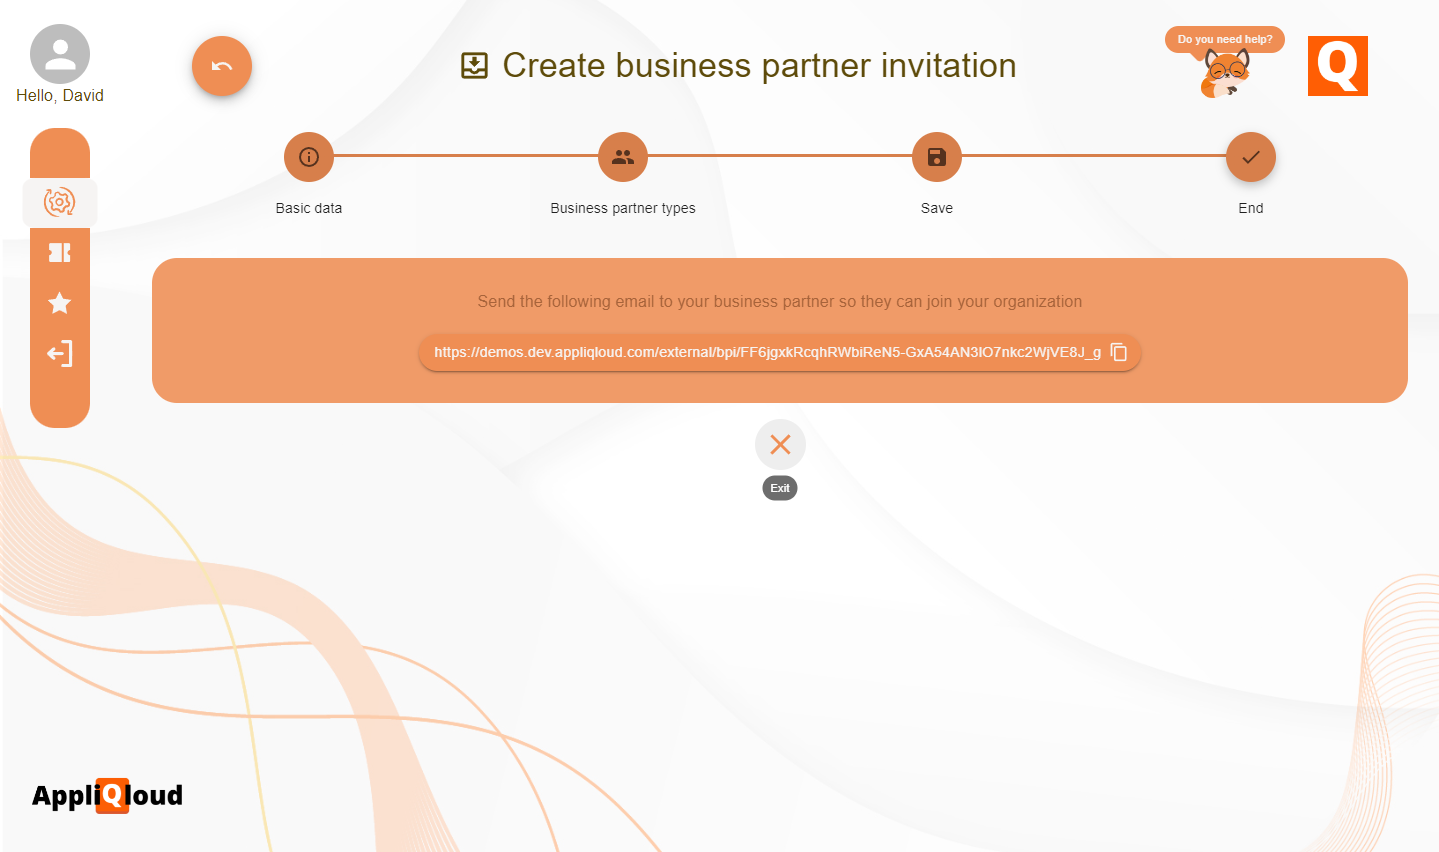
The invitation automatically expires after three days, so make sure that your business partners complete the registration process in this timespan. If the invitation expires you will need to create a new one.
Entering the provided link in the email will take us to a registration form in which the business partner provides some basic information, like their name, their contact email and the data of the business partner administrator. For this example, we will register as a Mexico-based company called . Once we send the application, we must wait for an administrator to accept it.
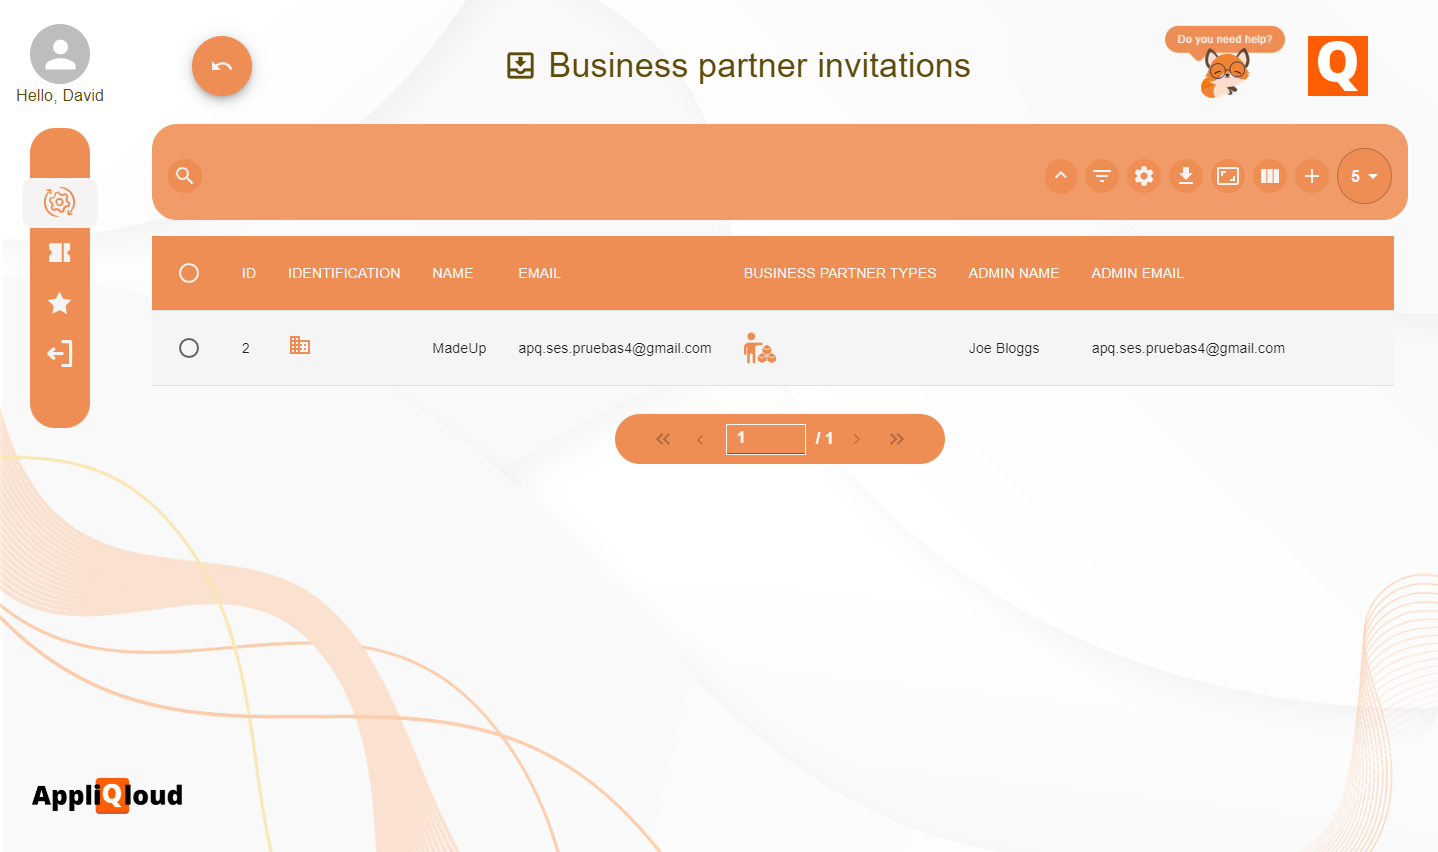
From the administrators perspective, we can now see that we have a new application in the business partner invitations report page. We can verify that the information is correct and that the business partner that registered is indeed the one that we intended to register. If this isn't the case, we can choose to reject the application. For this example, we assume everything is correct and accept the application.
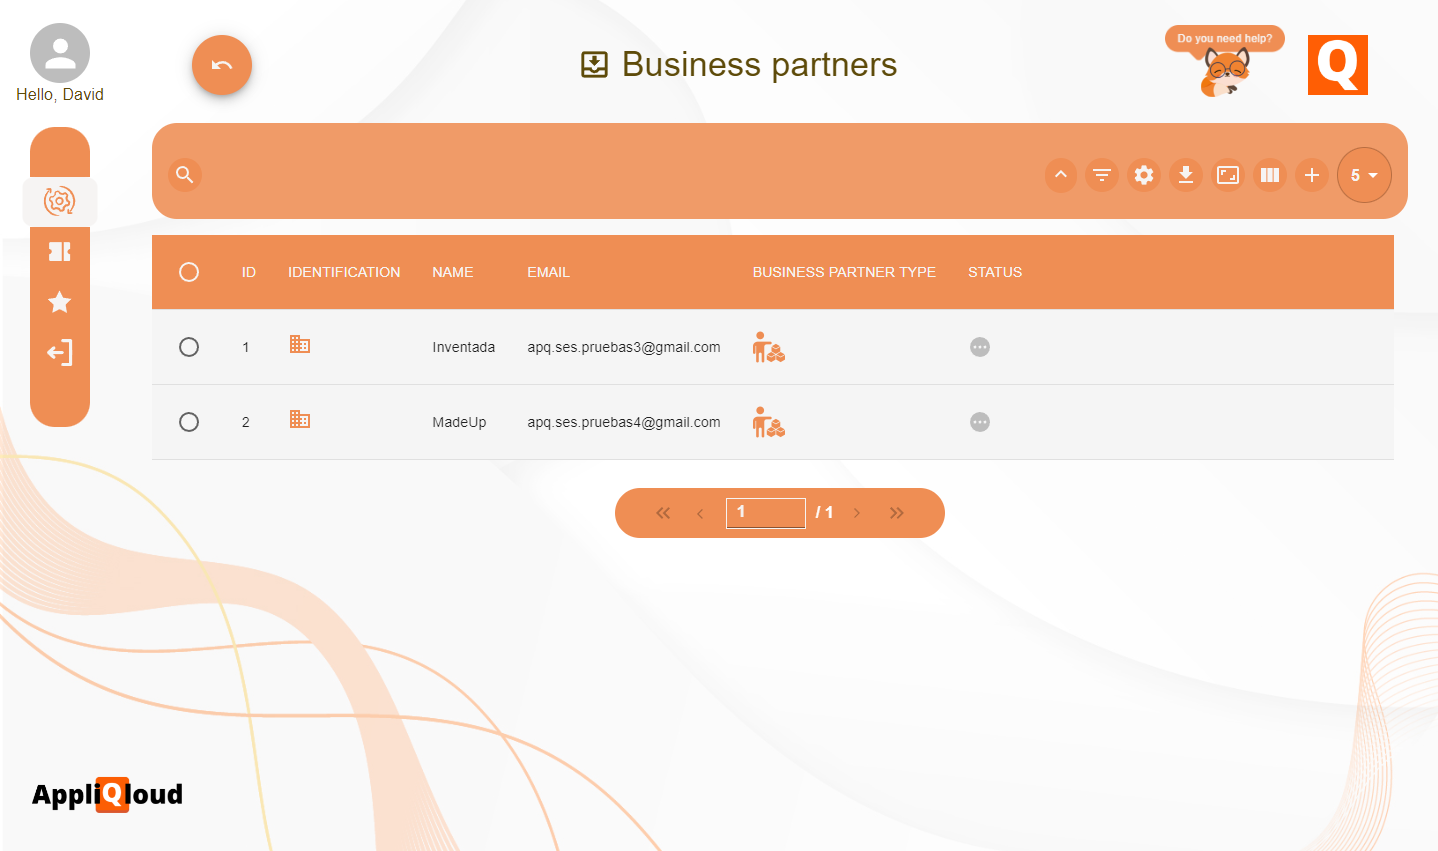
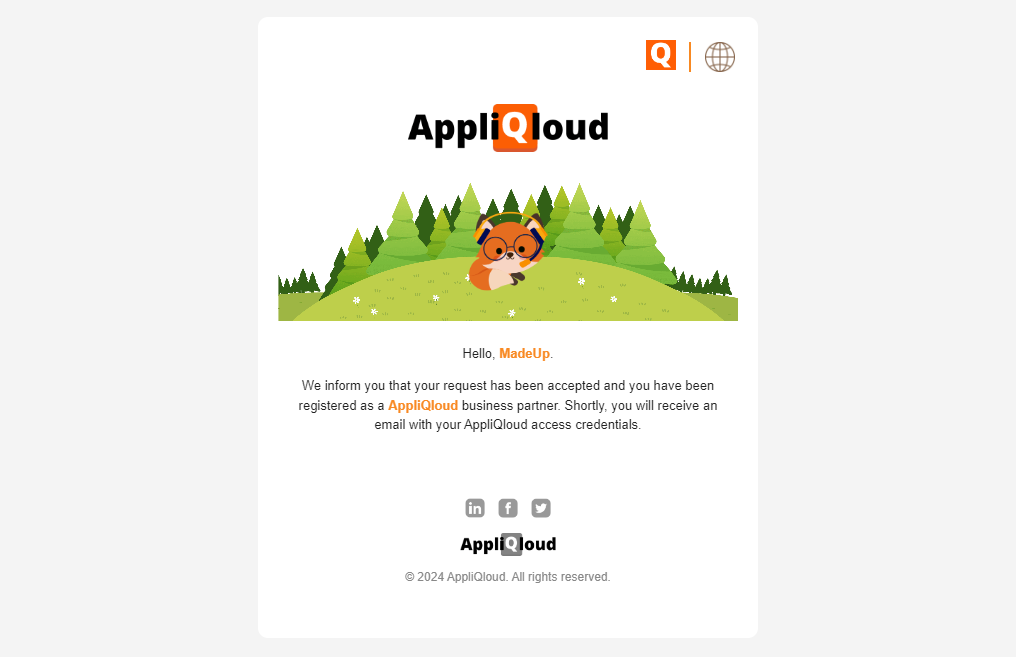
After a short waiting time, we should see the application dissapear from the reports page. If we move over to the business partners app (located under the Business partners card in the BUSINESS PARTERS card group), we should see a new business partner pop up. When we accepted the application, we created a new business partner with only a name, an email and the chosen business partner types, aside from creating one new external user and registering it as a business partner contact.
The external user must now enter the application with the credentials received through their email address and complete the registration process by filling out the form with their own information.
Once they have completed the registration process, they can request approval in the same way shown in the previous tutorial.
Once approved, the business partner is ready to receive purchase orders.